Maude’s Modifications: Class C RV Remodel
Many people draw a connection between remodeling an RV, and renovating a travel trailer or Airstream. They don’t necessarily think of a Class C being involved in the remodel. And with good reason, right? Class C RVs pretty much come equipped with everything you need. So why would you need to remodel a class C anyway? Well, for us, remodeling our Class C RV we aptly dubbed Maude, meant turning her into a home. The thing about class C RVs, and even Class A RVs for that matter, is that everything comes pretty standard as far as factory amenities. You have your wallpaper, you have your upholstery, you have your basic design. In fact, most RV companies even have names for these designs, or “themes” within their rigs. Ours, for example, was the “Aquarium with Honey Cherry”. This just meant a whole lotta beige and green.
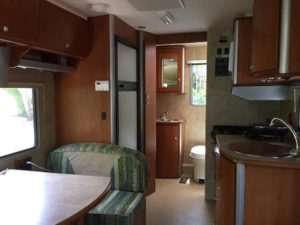
It was a beautiful rig, don’t get us wrong. But it wasn’t our vision. It was Winnebago’s vision. The floors weren’t our preference, the wallpaper resembled a jungle-type theme, and the carpet was fairly…worn- in, we’ll say. It was a 2007 rig and she had some miles on her. But we knew that if we were going to be living in Maude full-time, she needed to feel like home.
So, we started our RV renovation.
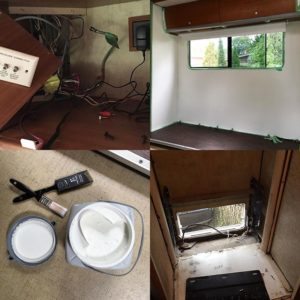
First, we painted over the wallpaper. To us, the wallpaper seemed a bit outdated, and we wanted something bright, fresh and somewhat modern. We used a Benjamin Moore paint that took…a lot of coats. Painting over wallpaper is tricky, because you need to do a fair amount of cleaning the walls first. We used rubbing alcohol, which helped remove any dirt and grit from the walls. Then, after a few good coats and a lot of masking tape around the edges, Maude got her first style-upgrade.
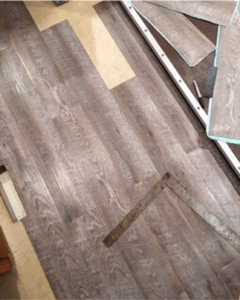
Next, we decided to change the floors. There was a beige linoleum that came with the rig, which while functional for a majority of the time, needed to be modernized. We were mulling over floor options, while also keeping in mind adding weight to the RV would probably be a bad idea, and landed on vinyl floor planks from StainMaster. With having zero experience in laying floors, this company does a great job of making the process simple and straightforward. It took us about two full days to get the flooring finished. Not because it was strenuous, but because there were a lot of precision cuts to make and…. we are perfectionists.
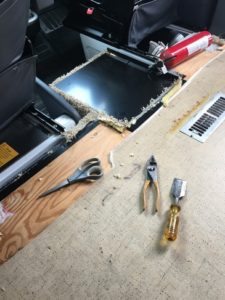
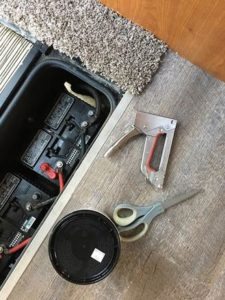
After having the floors so new and clean, we knew that dingy, beige carpet had to go. The new carpet we picked up at Home Depot for $14.57 a sq yard. Thankfully, when we tore up the original carpet, there was tons of wood which we could use to staple down the new carpet. On the spots where there was no wood, like the stairs for example, the old carpet adhesive was SO intense, we didn’t even need to add new adhesive, it just stuck perfectly. We finished the carpets in a day and it complimented our floors perfectly.
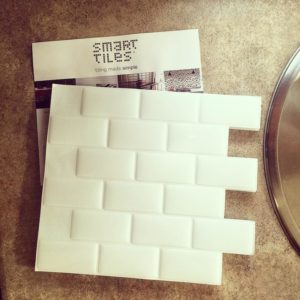
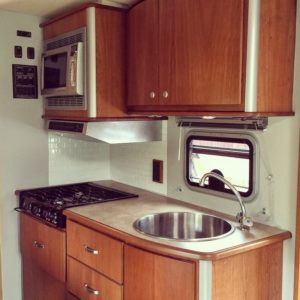
Since we do a lot of cooking in the RV, we wanted a functional backsplash in order to prevent messes, but also add a bit of flair to our kitchen. As much as we wanted white subway tiles to do the trick, thosewould’ve just added a bit too much weight. So, we went with the next best thing—Smart Tiles. These adhered so easily to the wall, they just fit perfectly. We needed to make a few cuts, but it wasn’t anything major. Once finished, the Smart Tiles added the right amount of personality to our tiny kitchen.
We also ditched the RV curtains that were hanging. They too, were beige, and not only were they very bulky and heavy, but they also came loose often. If you’re familiar with RV blinds, you’ll know how intricate they are to restring and hang. It was a lot of effort and work that we just didn’t see being worth it. We ended up with white, blackout blinds from Ikea, for less than $30 each for both big windows. They screwed into our cabinets and don’t shift at all while in transit. They still block out any light and give us necessary privacy, while adding a more modern feel to the rig. Not to mention, we use either of the big blinds to project our movies on with our portable projector. It was the perfect touch.
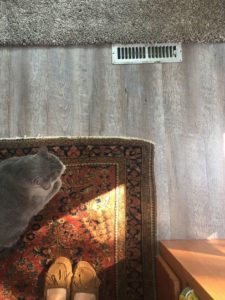
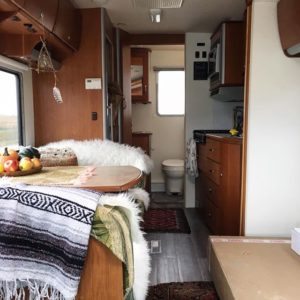
We also added a few design pieces throughout to add a bit more character: antique carpets on the floors, faux white furs to cover the upholstery, mason jars filled with beans, rice, and legumes which we used Velcro to adhere to the kitchen counter. We still have much more to go, in terms of remodeling, for example replacing our RV refrigerator with a standard mini fridge, adding more storage, and building a banquette in the slide out, rather than the bulky couch that came with the rig. We also are adding solar, so we can boondock as freely as we’d like.
Ultimately, as we said, we wanted our RV to feel like home. We wanted our own vision of décor and style, while adding both comfort and functionality. So the next time you hear someone say they remodeled their RV, remember that Class C RVs can get a style-boost, too.

